

Here I talk about what you want to enter in your WordPress settings to make your website as secure as possible.
Most people when they tell you to create your own Nice Website explain how to install everything and get things going, but they rarely talk about security, even basic things as I talk about below. I have some more of that when I talk about the WP Security plugin.
The installation process will depend on whether you do that installation yourself, manually, or you are using a system which automatically installs WordPress for you. The automatic installations offered by various hosts are likely to take care of the database part without annoying you with any questions. However, here I present all the steps when creating a WordPress on your own server without help from your host.
Advanced Installation (with your own server)
Note: If you choose BlueHost or another host service that auto-installs WordPress for you, then skip to the Installation Screens directly.
Installing the Code
In case you get your own server with an SSH access, you will want to Download WordPress.
Then the commands to install the code are:
-- commands to copy the code to your server
-- (or use sFTP)
local> scp wordpress-4.9.zip example.com:.
local> ssh example.com

-- once on the server
remote> sudo mkdir -p /var/www/example.com
remote> cd /var/www/example.com
remote> sudo unzip ~/wordpress-4.9.zip
remote> sudo mv wordpress public_html
remote> sudo chown -R www-data:www-data public_html
The chown command is to change the ownership of the files (owner:group). For Ubuntu and other Debian systems, Apache uses www-data. Please make sure that you specify the correct user on your server. For RedHat uses httpd:httpd.
Installing the Database
Assuming you already have MySQL installed, using the command line, you can create a database as follow:
remote> mysql
mysql> CREATE DATABASE db_example;
mysql> SELECT PASSWORD('user_pass');
+-------------------------------------------+
| PASSWORD('user_pass')                     |
+-------------------------------------------+
| *253C592CF2899711BF662EE08610D60D40833C80 |
+-------------------------------------------+
1 row in set, 1 warning (0.03 sec)

mysql> CREATE USER 'user_example'@'localhost' IDENTIFIED WITH 'mysql_native_password' AS '*253C592CF2899711BF662EE08610D60D40833C80';
mysql> GRANT ALL ON db_example.* TO 'user_example'@'localhost';
Please change db_example with your own database name. Avoid using wordpress as the name because that’s the default and thus hackers know about it. Also, avoid starting the name with wp_ and don’t use the name of your domain. So if your domain is example.com, don’t use example as the database name. Note that the name must start with a letter and be composed of letters and numbers only.
Please change user_pass with a password. It needs to be encrypted before you add it to the account so you have to do a SELECT first.
Please change user_example with your own username. Do not use the same name as the database. This is not the user that will log in your website. It’s just the database user. You can use something like u123 or your worst enemy’s name. The best is a name that a hacker is not going to discover easily. Just in case. The name will be added to the interface later.
Apache Setup
If you also have to setup Apache on your server (if that’s not automatic for your system.)
The entry can look about like this.
<VirtualHost *:80>
  ServerAdmin webmaster@m2osw.com
  DocumentRoot /var/www/example.com/public_html/
  ServerName example.com
  ServerAlias www.example.com
  <Directory "/var/www/example.com/public_html/">
    DirectoryIndex index.php
    AllowOverride All
  </Directory>
  ErrorLog /var/log/apache2/example.com-error_log
  CustomLog /var/log/apache2/example.com-access_log combined
</VirtualHost>
If you created sub-domains for w.example, ww.example, and wwww.example.com, enter these names on the ServerAlias line as well. These are useful in case someone misspells that part.
ServerAlias w.example.com ww.example.com www.example.com wwww.example.com
Then you can redirect the user to the one you prefer such as no www or with www. The following sends the user to www.example.com from any of the other sub-domains:
ServerName www.example.com
ServerAlias example.com w.example.com ww.example.com wwww.example.com
RewriteEngine on
RewriteCond %{HTTP_HOST} ^(example.com|w.example.com|ww.example.com|wwww.example.com)$
RewriteRule ^/(.*) http://www.example.com/$1 [R=permanent,L]
And the following sends the user to example.com (no sub-domain):
ServerName example.com
ServerAlias w.example.com ww.example.com www.example.com wwww.example.com
RewriteEngine on
RewriteCond %{HTTP_HOST} ^(w.example.com|ww.example.com|www.example.com|wwww.example.com)$
RewriteRule ^/(.*) http://example.com/$1 [R=permanent,L]
Once you are done with the editing, make sure to restart Apache2
sudo apt-get systemctl restart apache2
Then you can test that it works by going to the home page of your domain. But before you start the WordPress installation, consider installing an SSL Certificate and switch to port 443 instead of port 80.
SSL Certificate
In order to use an SSL certificate, you can use letsencrypt, which offers free certificates. Various hosts automatically offer this option. Make sure to use it if available (BlueHost, which is the one I strongly suggest you use, offers that option and I don’t recommend it just because I’m an affiliate, but having SSL is very important today!)
Under Ubuntu you can install it with the following command:
sudo apt-get install certbot
Then execute one of the following to create the SSL certificate.
The first URL must be the domain name you chose to use with WordPress, either example.com or www.example.com, so choose one of the following commands carefully:
sudo certbot --apache -d example.com -d w.example.com -d ww.example.com -d www.example.com -d wwww.example.com
# -- or --
sudo certbot --apache -d www.example.com -d example.com -d w.example.com -d ww.example.com -d wwww.example.com
The command will automatically add a few lines to the Apache settings to make it work. Note that the certbot command only works if the existing domain is already working. You MUST do that setup before you start the WordPress setup because the URL gets saved in the database and the configuration file. It’s complicated to fix that at a later time.
If you want all the redirects for all the sub-domains, you’ll have to copy the code above to the new entries that have the *:443 port specified. Then edit the *:80 entry to redirect all entries to the *:443 port otherwise it is likely to fail badly.
<VirtualHost *:80>
  DocumentRoot /var/www/www.example.com/public_html/
  ServerName www.example.com
  ServerAlias example.com w.example.com ww.example.com wwww.example.com
  ErrorLog /var/log/apache2/example.com-error.log
  CustomLog /var/log/apache2/example.com-access.log vhost_combined

  # Force HTTPS
  RewriteEngine On
  RewriteRule (.*) https://%{HTTP_HOST}%{REQUEST_URI}

  <Directory "/var/www/example.com/public_html/">
    DirectoryIndex index.php
    AllowOverride All
  </Directory>
</VirtualHost>
Once this is done, make sure you restart Apache to see that it all works as expected. Then test all the sub-domains to make sure that they do what you would expect.
sudo apt-get systemctl restart apache2
Installation Screens
Once the code, database, and website server are ready, going to the website presents a wizard with various forms that you have to fill.
If you get a website from a host that automatically installs WordPress, then you get right here and you may not even see all the forms presented here.
Language Selection
The first form offers you to select your language. It makes sense since all the other forms will use that language and it certainly makes it easier if it is in your own language. The default is English.
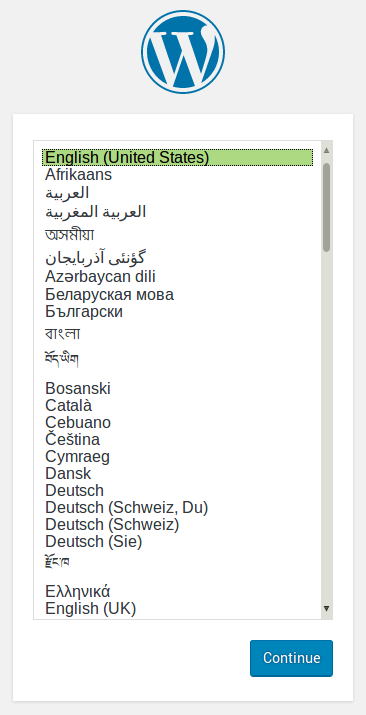
Once you’ve selected the language, click Continue.
Intermediate Screen
Next, we have a screen about what happens when installing WordPress. This screen can just be skipped, although you can take the time to read it too.
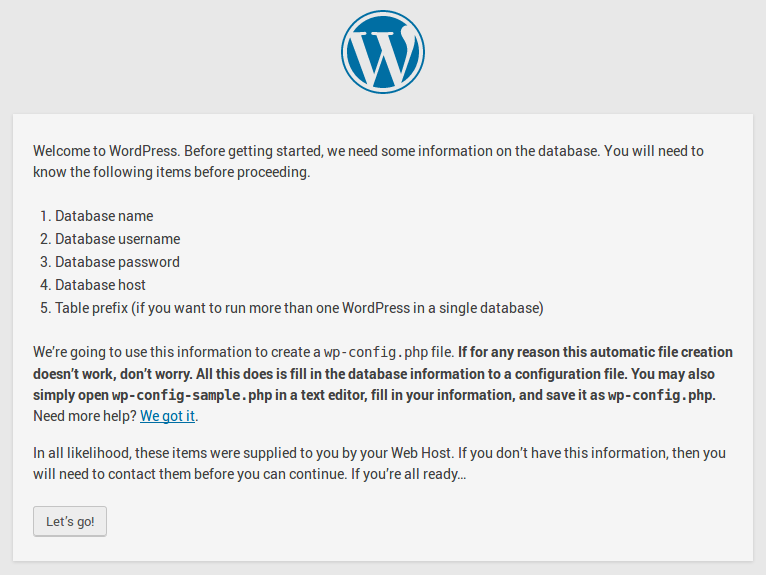
The installation changes the wp-config.php file and installs the default tables and data in the database, so WordPress works as expected.
Database Specification
When getting a website with a Host that offers to install WordPress for you, you probably get the database automatically installed so you are not likely to see this screen.
If you do see this screen, then it was automated. If you do see it, please make sure to change the Table Prefix so hackers have a harder time to hack your website. If automatic, hopefully, they do that too.
The wp_ is the default and hacker code will most often have that hard coded in their script.
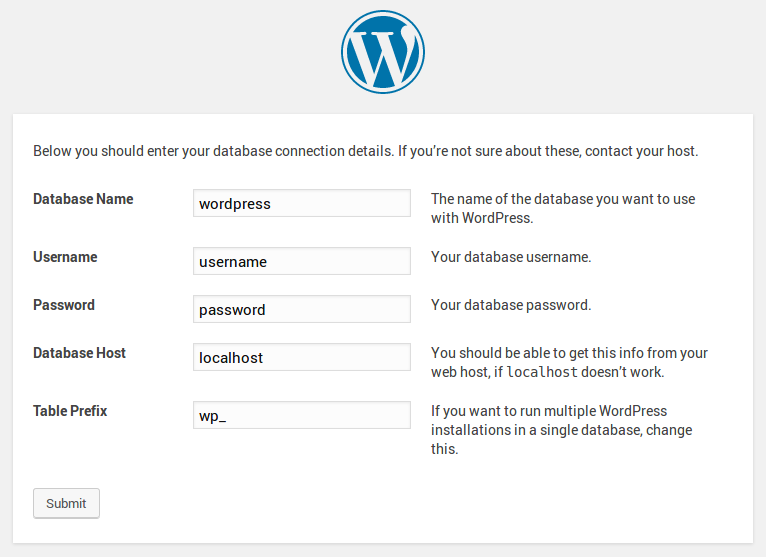
The database name (wordpress by default, but do NOT use that default, that’s not a good idea), is what you would have used earlier to create the database. Whether you used the command line CREATE DATABASE or had access to the database through cPanel, or another tool, the name should be easy enough.
username is the user that WordPress will use to access the database. It’s a good idea to have a name that has nothing to do with you (i.e. not your first or last name) or the domain name of your website. You could use something such as ‘u’ and a random number (u123). Note that you can’t change the username at this point. Whatever you chose for your database earlier when you created your database is what you need to enter here.
password is the password you entered for that user while creating it. It does not need to be too long, but a strong password should be used. Use letters and numbers, at least. Note that since that password is saved in clear in the wp-config.php file, it’s not going to be extraordinarily important to have a super top secret password as hackers can easily access it once they have access to your server.
localhost is the host where the database resides. At the start, it will likely always be localhost unless you are on a cloud system or something of the sort. The one reason to have the database on a different server is when you get a very large number of simultaneous visits to your site. it’s not likely to happen at the start. So don’t worry about this field.
wp_ is the prefix used when creating tables. By changing it, you make the life of many hackers much more complicated. They are likely to fail accessing your data. This is because their scripts will be using the default prefix and therefore your tables won’t be accessible to them. Of course, that information is saved in the wp-config.php file so it is not that complicated for a hacker to find out, but it’s not always that easy for them to read that file before they want (have) to access the database. Make sure to use a name that starts with a letter and then letters and numbers. Keeping the underscore is a good idea. For example “p123_” would do. Obviously, you should not use that specific example since it’s here and public.
Then click Submit.
In case the installation is not able to connect to your database, this screen appears. This means you entered something the wrong way or the database is really not accessible from Apache. It could also be that the user you created does not have permission to access the database. The GRANT command is very important in that respect.
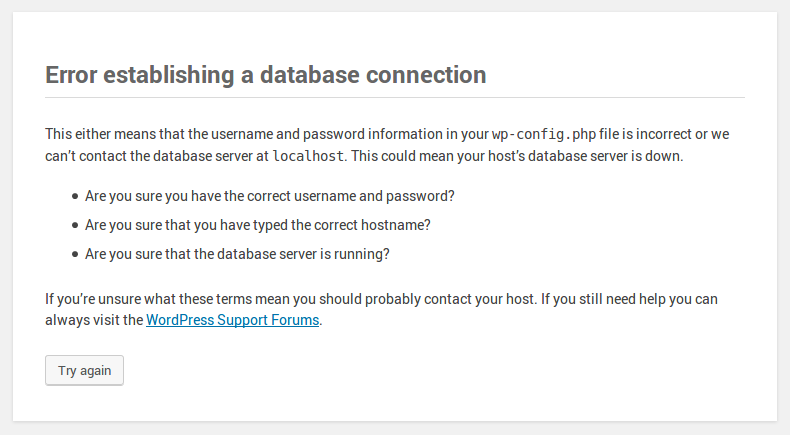
Click the Try Again button and make sure you entered the correct information. If everything looks correct, verify that your user has permission to create a table in the database.
WATCH OUT: when you have to retry, you must reenter the password each time. It will be reset to ‘password’ on purpose.
If the database and files system can both be accessed properly, then the following dialog saying that WordPress is ready appears.
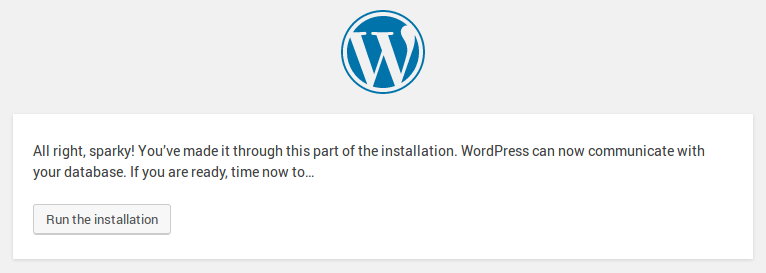
Click the Run the installation button.
Website Installation Form
Now you are ready to setup your website.
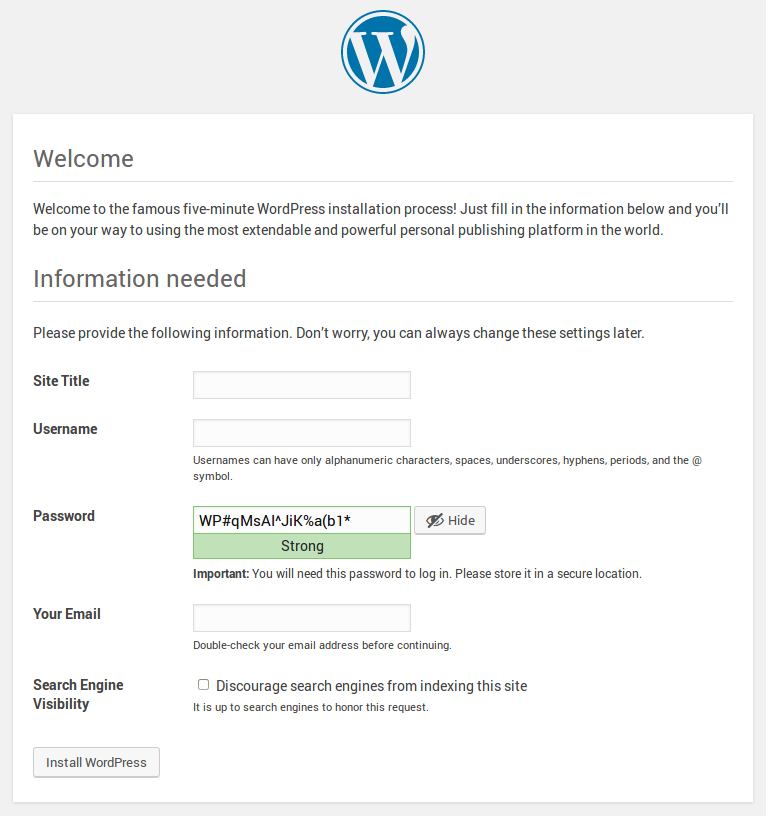
Here you want to enter the title of your website. Most often this is a repeat of your domain, but it can really be anything you’d like.
Then enter a username. Please avoid using any one of these names:
- admin
- administrator
- root
- example
- example.com
Where example and example.com represent your website domain name. Hackers will try to log in your account using any one of those names.
For the password, feel free to change it if you’d like. Using the default generated password is not a bad idea. It is really not likely to be one that hackers can guess anytime soon. You can save it in KeePassX or a similar tool that saves your password in an encrypted file. Saving your password in your browser is not as safe, although, on a computer at home, it’s generally not that bad.
Enter your email address.
Do NOT select “Discourage search engines from indexing this site”. Although all search engines do not follow the rules that this system generates, it will be followed by Google and that would mean that none of your pages would ever be found.
Then click the Install WordPress button.
Once the installation is done, a screen is shown telling you so. It can fail if the files can’t be written to the directory where it is supposed to go. Otherwise, you will get the Success! screen as follow:
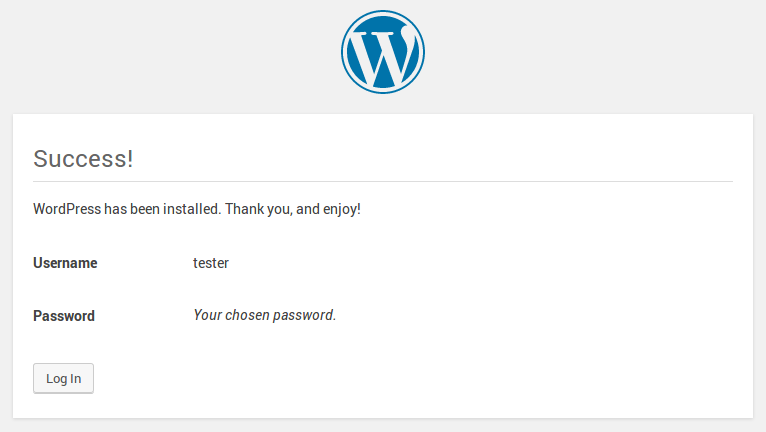
The screen just tells you that it worked. You will have to click the Log in button to go to the login screen. Since you are the administrator, for you that screen is under:
http://example.com/wp-admin
The login screen is a slightly different one, but you will get sent to that WordPress administration screen afterward.
Log In Screen
Here you enter your email address or username and then your password.
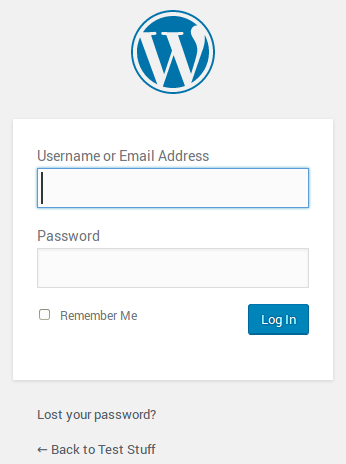
You may select the Remember Me since this is your website and you’ll be working on it day and night so having quick access is not a bad idea. Once in a while, you will be logged out anyway.
Website Ready for Plugins
Now that your website is installed, you can add Plugins. I have a list of plugins that I want you to install. One adds the “nofollow” to external links, another adds the “I’m not a robot” widget to forms such as the Login form. I also want you to install a security plugin to make sure hackers can’t find your password (at least not easily.)
I have another list of plugins that are optional. Installing them is really not mandatory, but they can help your site in various ways. A certain number of plugins can help in increasing your chances to make sales.